How Do You Install Steel Roofing: A Step-by-Step Guide for DIY Homeowners
Installing a steel roof is a smart investment that can last up to 70 years while reducing cooling costs by reflecting heat away from your home. The process involves multiple layers, starting with proper preparation of the roof deck and moving through underlayment installation before placing the actual metal panels. The key to successful metal roof installation is measuring accurately, ensuring you know both the square footage of your roof and the length from ridge to eave before purchasing materials.
While you can sometimes install metal roofing directly over existing shingles (if local building codes allow), removing old roofing often provides the best foundation. Working at a steady pace, you’ll install underlayment, then the metal panels themselves, moving systematically across the roof. The entire process is doable for a dedicated DIYer with basic skills, though it typically takes a few days to complete.
Key Takeaways
- Metal roofing requires accurate measurements and proper layering techniques to ensure a watertight, long-lasting installation.
- You can sometimes install metal roofing over existing shingles, but removing old roofing creates a better foundation.
- Steel roof installation is a viable DIY project that takes a few days but delivers 50-70 years of performance with minimal maintenance.
Understanding Steel Roofing

Steel roofing offers homeowners a durable, long-lasting solution that can withstand harsh weather conditions while providing energy efficiency benefits. When properly installed, steel roofs can last 40-70 years with minimal maintenance.
Types of Steel Roofing
Galvanized Steel is the most common and economical option, featuring a protective zinc coating that prevents rust. It’s ideal for most residential applications.
Standing Seam Panels provide a clean, modern look with raised seams that connect panels while keeping fasteners hidden. This design prevents water infiltration and creates a sleek appearance.
Corrugated Metal Panels have a wavy pattern that adds structural strength. These panels are:
- Easy to install
- Cost-effective
- Great for both residential and agricultural buildings
Steel Shingles mimic traditional roofing materials like slate or tile but offer superior durability. They’re lightweight and can often be installed over existing roofing materials.
Key Benefits of Steel Roofing
Durability and Longevity make steel roofing an excellent investment. Unlike asphalt shingles that may need replacement every 15-20 years, steel roofs can last 3-4 times longer.
Weather Resistance is exceptional with steel roofing. It withstands:
- Heavy snow loads
- High winds (up to 140 mph)
- Hail impact
- Fire (Class A fire rating)
Energy Efficiency comes from steel’s reflective properties. Steel roofs reflect solar heat rather than absorbing it, reducing cooling costs by 10-25% during summer months.
Low Maintenance requirements save homeowners time and money. Steel roofs don’t crack, curl, or split like traditional materials, and they resist mold and mildew growth.
Eco-Friendly attributes include recyclability and reduced landfill waste. Most steel roofing contains 25-95% recycled content and is 100% recyclable at the end of its life.
Preparation and Safety Guidelines

Before starting a steel roof installation, thorough preparation and safety measures are essential. Proper planning helps prevent accidents and ensures the project runs smoothly from start to finish.
Gathering Required Tools and Materials
A successful steel roofing installation requires specific tools and materials. For tools, you’ll need:
- Cordless drill with magnetic bit
- Metal snips for cutting panels
- Hammer and roofing nails
- Chalk line for marking
- Tape measure
- Level
- Ladder tall enough to safely reach the roof
- Utility knife
For materials, gather:
- Steel roofing panels
- Underlayment
- Screws with rubber washers
- Foam closure strips
- Ridge caps
- Flashing for edges and penetrations
Purchase extra materials (10-15% more than measured) to account for waste and mistakes. Organize all tools and materials in one accessible location before beginning work to prevent delays during installation.
Assessing Roof Structure and Compliance
Examine the roof structure to ensure it can support steel roofing. Check for:
- Damaged or rotting wood
- Proper ventilation systems
- Adequate slope (minimum 3:12 pitch recommended)
- Current roofing condition
Remove existing asphalt shingles if necessary, or verify local building codes about installing over them. Many areas require permits for roofing projects, so contact local authorities before starting work.
Identify roof penetrations like chimneys, vents, and skylights that will need special flashing. Measure the roof carefully, accounting for overhangs and ridge details. If structural issues exist, consult a professional roofing contractor before proceeding.
Ensuring Site Safety
Safety should be the top priority during steel roof installation. Always wear:
- Non-slip footwear
- Heavy-duty gloves
- Safety goggles
- Hard hat
- Long sleeves and pants
Use a safety harness attached to a secure anchor point when working on steep roofs. Set up scaffolding or guardrails for additional protection against falls.
Never work on wet or icy roofs. Choose calm weather days without strong winds. Keep the work area clear of debris and organize tools to prevent tripping hazards.
For two-story homes or steep pitches, consider hiring professionals. Have a first aid kit readily available and work with a partner who can assist in emergencies. Take regular breaks to prevent fatigue, which often leads to accidents.
Removing Old Roofing and Inspecting Deck
The first step in steel roof installation is removing the existing roof materials. This critical process allows for proper inspection of the underlying structure before adding new materials.
Start by completely stripping off all old asphalt shingles or other roofing materials. Use a roofing shovel or tear-off tool to pry up and remove the old materials section by section, working from top to bottom.
Don’t forget to remove all roofing nails that remain after taking off the shingles. Any protruding nails can damage your new steel roof and create leaks.
Once the deck is exposed, inspect it thoroughly for signs of water damage, rot, or structural weakness. Replace any damaged or soft sections of the deck before proceeding.
Look for these common issues:
- Dark stains indicating moisture problems
- Soft or spongy areas when walked on
- Visible mold or mildew growth
- Warped or buckled wood
- Cracks or holes in the decking
After repairs, ensure the deck is clean, dry, and smooth before moving to the next step in the roofing installation process. Remove all debris, dust, and loose materials.
A proper inspection now prevents costly problems later. Steel roofing requires a solid foundation to perform correctly and last for decades.
Installing Underlayment and Preparing the Roof
Proper preparation of your roof deck and installation of underlayment creates a critical moisture barrier under your steel roofing. This foundation work prevents leaks and extends the life of your metal roof system.
Applying Underlayment and Ice and Water Shield
Start by cleaning the roof deck thoroughly. Remove old shingles, sweep away debris, and pull out any loose nails or fasteners. Replace any water-damaged sheathing to ensure a solid base.
For areas with freezing temperatures, install ice and water shield along the eaves, extending at least 24 inches past the interior wall line. This self-healing membrane prevents water backup from ice dams.
Next, roll out synthetic roofing underlayment horizontally, starting at the bottom edge of the roof. Work your way up, overlapping each row by 4-6 inches. Secure with cap nails or staples according to manufacturer specifications.
For complete protection in valleys and around penetrations, add additional layers of underlayment. Smooth out wrinkles as you go to prevent bumps under the metal panels.
Setting Drip Edge and Eave Trim
Install drip edge along the eave edges first, before underlayment at the eaves. This metal trim prevents water from getting under the roofing at the edge.
Place the drip edge flush against the roof edge and secure with roofing nails every 8-12 inches. The underlayment should overlap the drip edge by approximately 1.5 inches at the eaves.
For the rake edges (sides of the roof), install drip edge on top of the underlayment. This creates a clean finish and directs water away from the fascia.
Eave trim goes on last, providing additional protection at the bottom edge of the roof. Attach it securely with appropriate fasteners, ensuring it aligns perfectly with your drip edge for optimal water runoff.
Installing Steel Roofing Panels
Installing steel roofing panels requires careful placement and proper fastening to ensure a watertight seal. The right techniques will help your metal roof last for decades while standing up to harsh weather.
Placing and Aligning Metal Panels
Start by placing the first metal panel at the edge of the roof, making sure it overhangs the eave by 1-2 inches. Use a chalk line to create straight guidelines across the roof surface. This ensures all panels line up correctly.
For corrugated metal panels, overlap each panel by one full corrugation. For standing seam panels, follow the manufacturer’s instructions for proper alignment.
Butyl tape applied between overlapping panels creates a watertight seal. Place it along the edge before positioning the next panel.
Work from one edge of the roof to the other, checking alignment frequently. Panels should be square with the roof edge and parallel to each other.
If cutting is needed, use tin snips for small cuts or a circular saw with a metal-cutting blade for longer cuts. Always wear gloves when handling metal panels to avoid cuts.
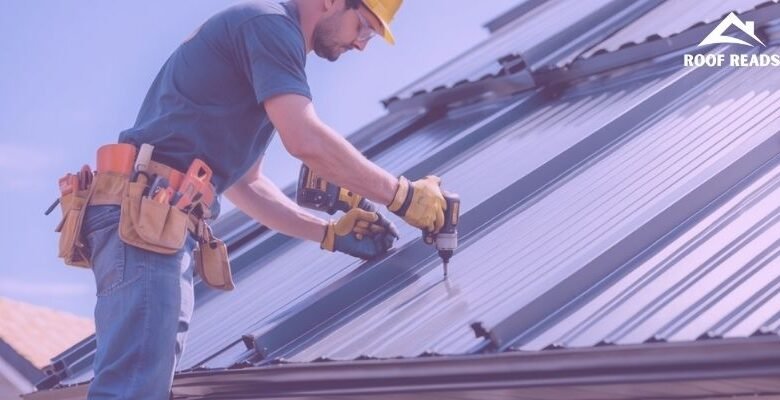
Securing Panels With Fasteners and Roofing Screws
Roofing screws with rubber washers are the most common fasteners for metal roofing. These exposed fasteners create a watertight seal when properly installed.
Drive screws through the flat areas of the panel, not through the raised ribs. Screws should penetrate at least 1 inch into the roof deck or purlins.
Space fasteners about 24 inches apart in the middle of panels and 12 inches apart at the edges. This pattern provides optimal holding power.
Apply firm, even pressure when driving screws. The rubber washer should compress slightly but not distort. Overtightening can damage the washer and create leaks.
For best results, use self-drilling metal roofing screws that match your panel color. Most manufacturers recommend #10 screws for standard installations.
Check all fasteners after installation to ensure none were missed or improperly seated. A single loose screw can lead to leaks or wind damage.
Flashing and Trim Installation
Proper flashing and trim installation is crucial for protecting your steel roof from water damage and ensuring a finished appearance. These components seal vulnerable areas and create clean edges where roof sections meet walls or end.
Installing Flashing for Roof Penetrations
Roof penetrations like chimneys, vents, and skylights need special attention. Start by measuring the area where flashing will be installed and cut the metal flashing to size using metal snips, allowing for a 2-3 inch overlap.
Apply roofing sealant around the penetration before positioning the flashing. For vent pipes, use boot flashing that fits snugly around the pipe. Slide the flashing under the upper roofing panels and over the lower ones.
Secure the flashing with appropriate fasteners placed every 12 inches. Be careful not to overtighten, which can warp the metal or damage the seal. For sidewall flashing, tuck the vertical edge under the siding and secure it to the wall.
Finish by applying roofing sealant along seams to ensure a watertight connection.
Attaching Ridge Cap and Gable Trim
Ridge caps cover the peak where two roof slopes meet, while gable trim finishes the edges. Measure the length of your ridge and gable edges before cutting materials to size.
For ridge caps, start at one end of the roof and work toward the other. Place the ridge cap over the peak and secure it with fasteners through the high points of the roofing panels, spaced about 12 inches apart.
Gable trim installation requires attaching the trim to both the roof edge and fascia board. Position the trim so it overlaps the roofing panels by at least 2 inches. Secure with fasteners every 12-18 inches.
For best results, use butyl tape between the trim and roofing panels to create a weather-tight seal. Overlap pieces by 3 inches when multiple sections are needed.
Sealing and Waterproofing
Proper sealing and waterproofing are crucial steps that determine how well your metal roof will protect your home from the elements. These processes help prevent water intrusion and extend the life of your roof.
Applying Sealant and Butyl Tape
Start by applying sealant to all roof penetrations, including vents, chimneys, and skylights. Use a high-quality roof sealant specifically designed for metal roofing systems.
For panel overlaps, apply butyl tape between the metal sheets before securing them with fasteners. This creates a watertight seal at these critical junctions.
When sealing screws and fasteners, apply a small dab of sealant to each one after installation. This prevents water from seeping through these tiny openings.
Pay special attention to roof valleys and edges, as these areas are particularly vulnerable to leaks. Apply a thick bead of sealant along these sections and smooth it out with a putty knife.
Preventing Water Damage and Leaks
Install proper flashing where the roof meets walls or other roof sections. Flashing directs water away from these vulnerable areas and should be sealed thoroughly with appropriate sealant.
Use non-corrosive fasteners made of stainless steel or aluminum. These materials resist rust and create more reliable, long-lasting seals than standard fasteners.
Check for and fix any dimples in the metal panels, as these can collect water and lead to leaks. Proper installation techniques help prevent dimpling.
Consider adding a waterproof underlayment beneath the metal panels for an extra layer of protection. This provides backup waterproofing if the primary seals fail.
Regular inspection of sealants is necessary, as they can deteriorate over time. Plan to reapply sealant every 10-15 years depending on your climate and the product used.
Final Steps and Cleanup
Once the metal panels are secured, you’ll need to complete several important finishing steps to ensure your roof functions properly and looks great. These final tasks protect your investment and help your new steel roof perform at its best.
Ventilation and Finishing Touches
Proper ventilation is crucial for any roof system, especially metal roofs. Install ridge vents along the peak of the roof to allow hot air to escape. Ridge caps should then be secured over these vents to maintain a clean appearance while protecting from water infiltration.
Check that all trim pieces are properly installed around edges, valleys, and peaks. These pieces add aesthetic appeal while preventing water from seeping underneath the metal panels.
Install snow guards in colder climates to prevent dangerous snow slides. Add specialized closure strips under the eaves and ridge to block insects and small animals from entering while still allowing airflow.
Apply touch-up paint to any scratches or minor damage that occurred during installation to prevent rusting.
Cleaning the Work Area and Gutters
Remove all metal scraps, fasteners, and debris from the roof surface. These items can cause scratches or rust spots if left behind. Use a magnetic sweeper to collect small metal pieces from the ground around your work area.
Clean your gutters thoroughly as they likely contain metal shavings and other installation debris. Blocked gutters can cause water to back up under the roofing.
Inspect the entire roof for any loose fasteners or panels that need additional securing. Look for any gaps in the flashing or trim that might allow water penetration.
Dispose of all waste materials properly according to local regulations. Many metal scraps can be recycled, so separate these from other construction waste.
Considering Professional Installation vs. DIY
Installing steel roofing requires careful consideration of your skills, budget, and time. The decision between tackling this project yourself or hiring professionals impacts the quality, cost, and longevity of your roof.
Choosing Between DIY and Professional Roofing Contractor
A DIY steel roofing project can save significant money on labor costs. Homeowners with roofing experience and proper tools might find this appealing. However, metal roofing is complex and requires precision to ensure proper installation and weatherproofing.
Professional roofing contractors bring specialized training and years of experience to the job. They work efficiently, often completing in days what might take a DIY enthusiast weeks. They also understand proper safety protocols for working at heights.
The complexity of steel roofing makes it particularly challenging for a DIY project. Professionals know how to properly overlap panels, install flashing, and seal edges to prevent leaks.
Cost considerations extend beyond immediate savings. A poorly installed DIY roof may lead to expensive repairs later, while professional installation typically includes warranties for both materials and workmanship.
For most homeowners, the intricate nature of steel roofing installation makes professional installation the safer and more reliable choice.
Frequently Asked Questions
Steel roofing installation brings up many common questions about the process, materials, and techniques. Here are answers to the most frequently asked questions about installing steel roofing on your home.
What are the steps for installing metal roofing on a residential property?
Installing metal roofing on your home requires careful preparation and execution. First, remove the old roofing material completely and inspect the roof deck for any damage.
Next, install a proper underlayment to create a moisture barrier. This step is crucial for preventing leaks and extending the life of your roof.
Install the starter strips along the eave edge of the roof. These guide the first row of panels and ensure proper water runoff.
Secure metal panels starting from one edge of the roof. Work your way across, making sure each panel overlaps correctly according to manufacturer specifications.
Finally, install ridge caps and flashings around chimneys, vents, and valleys to ensure water tightness at all transition points.
Can you provide a comprehensive guide to metal roof installation, including diagrams?
Metal roof installation follows a specific sequence that begins with measuring your roof carefully. Calculate the square footage and add 10% for waste and overlaps.
The layering system is critical – your roof should have decking, then underlayment, then the metal panels themselves. This creates a complete system that sheds water effectively.
For panel installation, always work from eave to ridge (bottom to top). Secure panels according to the manufacturer’s recommended screw pattern, typically every 24 inches along the seam.
Proper flashing installation around penetrations prevents leaks. Use special boot flashings for pipes and custom flashings for chimneys and walls.
Ridge caps finish the installation, covering the peak where panels meet and providing ventilation if vented ridge caps are used.
What are common mistakes to avoid when installing a metal roof?
Using the wrong fasteners is a critical mistake in metal roofing. Always use screws with neoprene washers specifically designed for metal roofing to prevent leaks.
Failing to account for thermal movement can cause buckling. Leave proper spacing according to manufacturer guidelines to allow metal to expand and contract.
Improper panel overlaps often lead to leaks. Follow the manufacturer’s overlap specifications exactly – typically 1-2 inches depending on the panel profile.
Walking directly on panels can cause denting or damage. Use proper roof ladders or walking boards that distribute weight across multiple ribs.
Skipping the underlayment saves money but causes condensation problems. Never install metal directly on old shingles or bare decking.
What is the estimated cost of installing a metal roof?
Steel roofing materials typically cost between $5 and $12 per square foot, depending on the gauge and coating quality. Premium finishes and thicker gauges command higher prices.
Installation labor adds another $3 to $7 per square foot when done professionally. Complex roof designs with multiple valleys and penetrations increase this cost.
The total project cost for an average 2,000 square foot home ranges from $16,000 to $38,000 for a complete metal roof installation. This includes materials, labor, and disposal of old roofing.
DIY installation can save about 30-40% on labor costs but requires specialized tools and knowledge. Factor in equipment rental costs if attempting self-installation.
Remember that metal roofing typically lasts 50-70 years, making the lifetime cost much lower than asphalt shingles that need replacement every 15-20 years.
What materials or underlayment are recommended beneath steel roofing for proper installation?
Synthetic underlayment is the modern standard for metal roofing. It offers superior water resistance and durability compared to traditional felt papers.
Self-adhering ice and water shield should be installed in valleys, around penetrations, and at eaves. This provides extra protection in areas prone to water intrusion.
A slip sheet or separation layer is necessary when installing metal over certain materials. This prevents chemical reactions between incompatible materials.
Proper roof deck preparation ensures a smooth base. Any damaged decking should be replaced, and the surface should be clean and dry before underlayment installation.
Radiant barriers can be added beneath metal roofing in hot climates. These reflective underlayments reduce heat transfer into the attic space.
What are the best practices for securing metal roofing panels with screws?
Use screws specifically designed for metal roofing with integrated neoprene washers. These create a watertight seal and resist backing out over time.
The proper screw pattern varies by panel type but typically includes fastening every 24 inches along seams and overlaps. Follow manufacturer specifications exactly.
Avoid overtightening screws, which can compress the neoprene washer too much. Screws should be snug but not so tight that they create dimples in the metal.
Screws should penetrate the roof deck by at least 3/4 inch for proper holding power. Longer screws may be needed if installing over existing roofing.
Place screws in the flat part of the panel rib, not at the very top of the rib. This positioning maximizes water resistance and structural integrity.